
Construction · Trim-out
The last week: trim-out, paint and the walkthrough.
Trim-out is when every trade comes back to finish what it started: the plumber for faucets, the toilet and the shower trim, the electrician for fixtures, dimmers and under-cabinet light, the tile setter for the backsplash, the painter for the walls and trim, the installer for hardware and the last adjustments. It ends with a walkthrough of the room against the drawings and a short punch list, and then the room is yours.
At a glance
When it happens and how long it takes.
Trim-out is the last one to two weeks of a six-to-ten-week kitchen build and the last few days of a three-to-five-week bathroom. The backsplash goes on after the counters, paint goes on after the backsplash, and fixtures, hardware and appliances go in after paint, so nothing has to be masked twice. The walkthrough is scheduled for the day the punch list is done.
The durations are planning guidance as of September 2026, not a schedule for your project.
What happens
Every trade, one more time.
In the order that keeps finished surfaces from being damaged by the next step.
- 01
Backsplash
Set on the counters with a clean sealant joint at the bottom, outlets brought flush with the finished tile, grouted and sealed. A full-height stone backsplash goes in with the counters instead.
- 02
Paint
Walls, ceiling and trim in the chosen colors over the primer from earlier, with the cabinets and counters protected. Touch-ups wait for the very end.
- 03
Plumbing trim-out
Faucet, disposal, dishwasher and refrigerator line connected; in a bathroom the toilet set, the vanity faucets and drains, the shower valve trim, head and hand shower, the tub filler. Everything run and checked for leaks.
- 04
Electrical trim-out
Pendants, sconces and recessed trims, dimmers and switches, under-cabinet lighting and its driver hidden behind the light rail, the range hood and the exhaust fan connected, every outlet tested.
- 05
Appliances
Delivered earlier and now installed: the range leveled and connected, the refrigerator and dishwasher paneled, the hood set and run. Each one turned on and checked.
- 06
Hardware, glass and the last carpentry
Pulls and knobs drilled to the confirmed positions, doors and drawers aligned, toe kicks and crown finished, the shower glass measured after grout and installed, mirrors hung, thresholds set.
- 07
Clean, walkthrough and punch list
The protection comes up, the room is cleaned, and you walk it with the construction lead and the drawings. Anything that needs attention goes on a short written list with dates, and the file of photographs, manuals and warranties is handed over.
From our jobs
What this stage looks like.
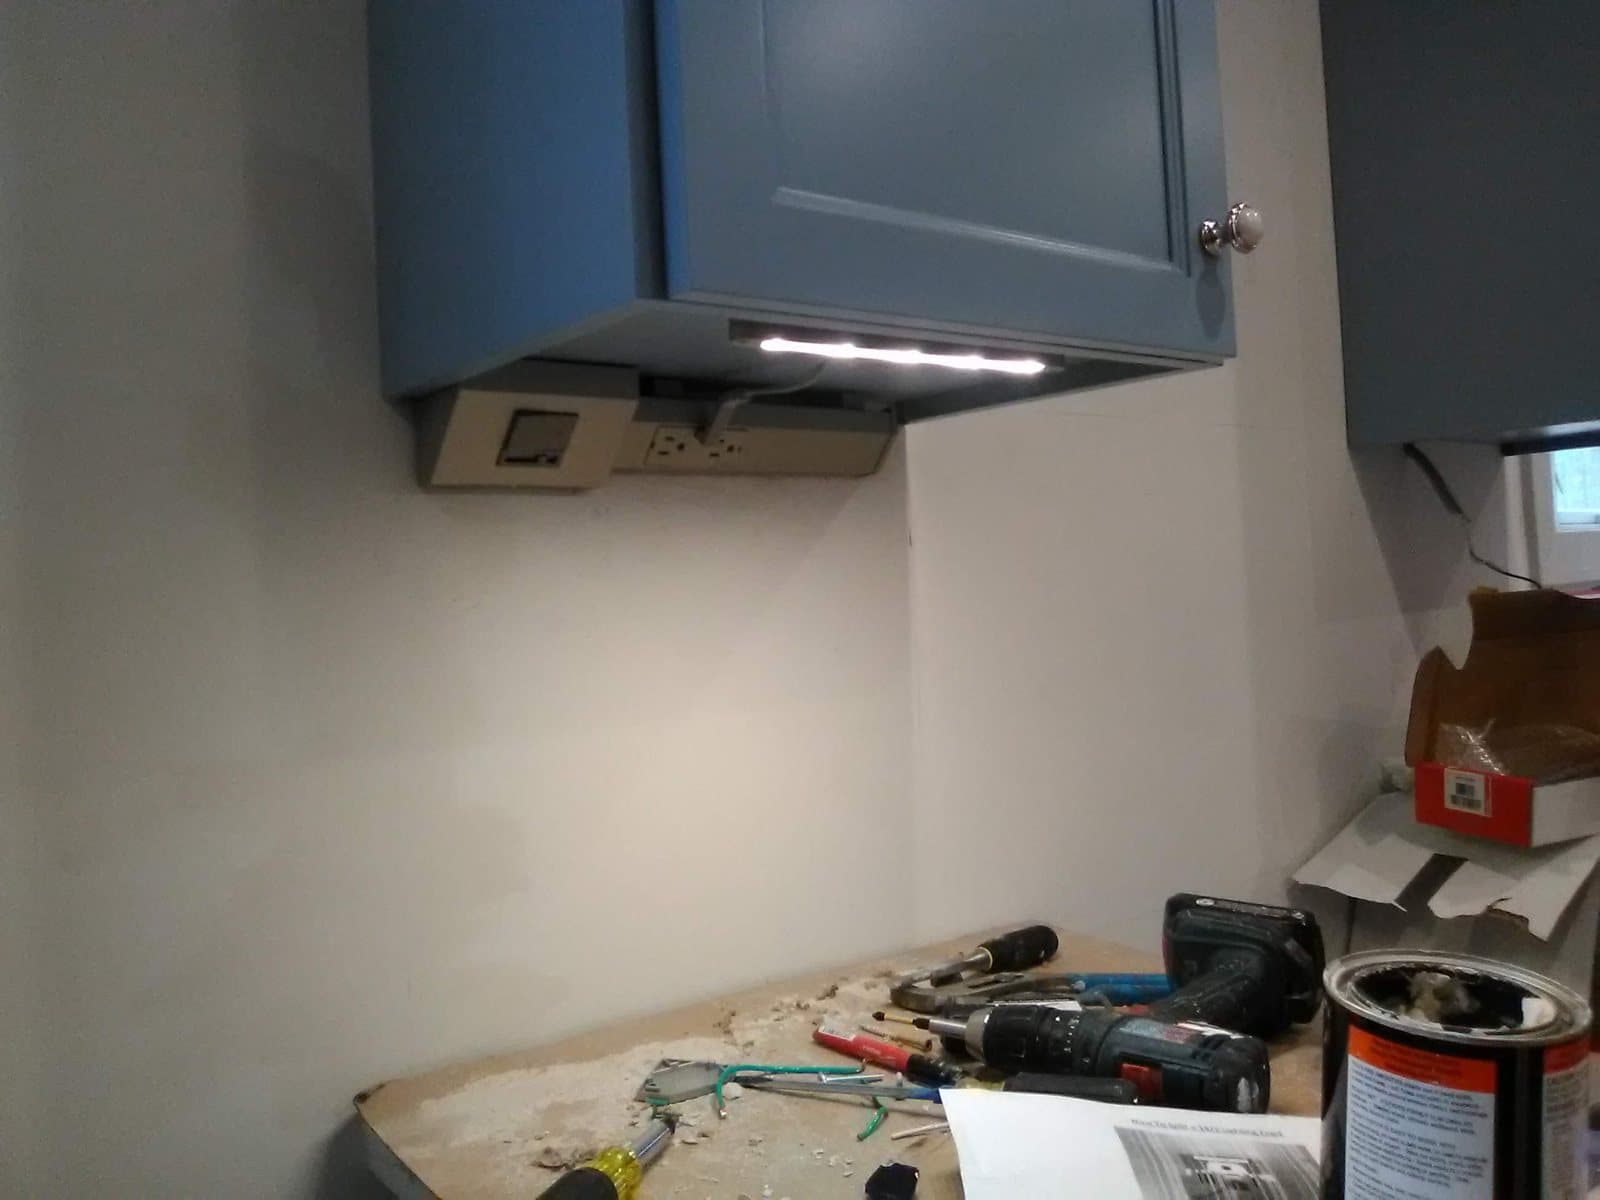
Electrical trim-out: the under-cabinet LED strip lit, with the outlet strip and its driver mounted under the cabinet where the light rail will hide them. 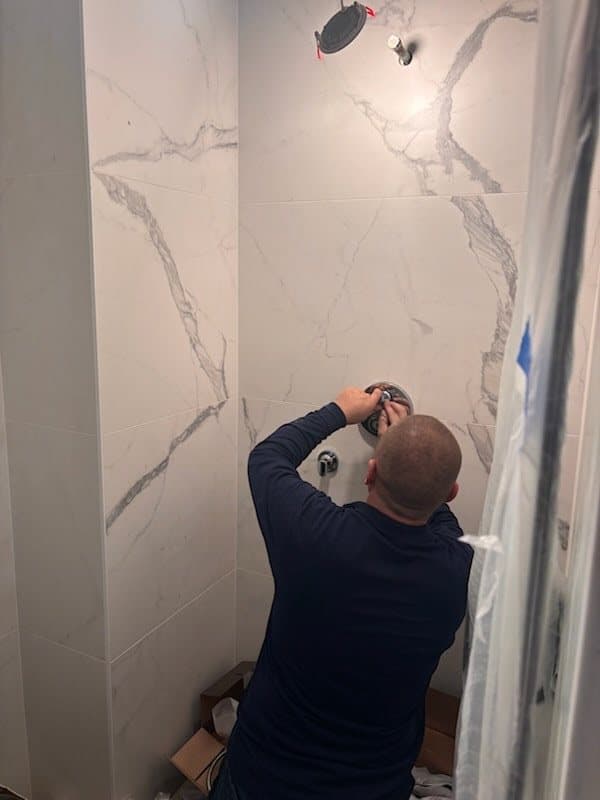
Plumbing trim-out in a bathroom: the valve trim fitted to large-format tile, with the ceiling shower head already in. The valve body was set to this position at rough-in. 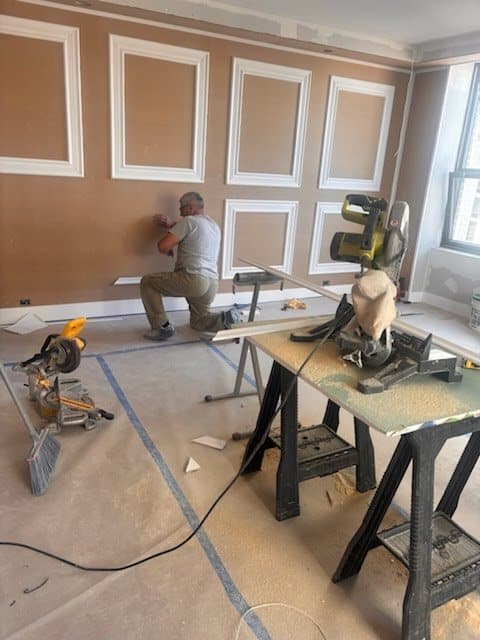
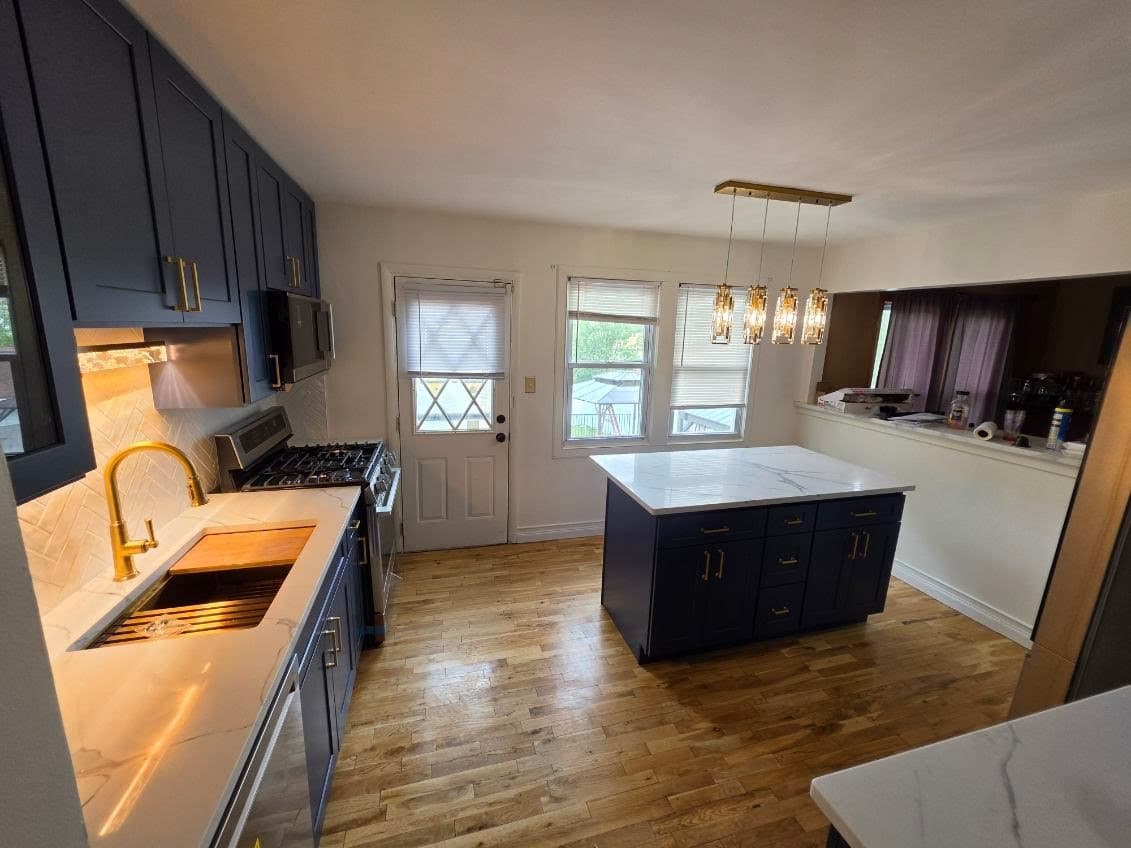
Finish carpentry: panel moulding fitted with two miter saws on a protected floor, filled and painted with the walls in the same week. After the walkthrough: navy cabinets, brass hardware, a white island with seating and a herringbone backsplash, with the protection up and the room in use.
Photographs taken by our team during construction, captioned by stage. They are not design references.
Your side of it
The walkthrough, and what you receive.
The walkthrough takes an hour or so. You open every door and drawer, run every faucet and appliance, try every switch and dimmer, and look at the room in daylight and with the lights on. Anything that is not right goes on the punch list, with a date, and small items are usually handled the same week. The room is ready to use the day the walkthrough is done, with the punch list finished around you.
- A written punch list with dates, if anything is on it
- The project file: photographs of the open walls and the flood test, the permit and inspection records, drawings and the selections schedule
- Manuals and warranty cards for the appliances, fixtures and finishes, and care notes for stone, wood and paint
- Spare tile, a labeled can of each paint color and any extra hardware
- One contact for anything that comes up after the walkthrough
Before the walkthrough
What the construction lead checks first.
The walkthrough is for you. Before it, the lead goes through the room with the same list so most of the punch list is already done.
- 01
Every fixture run
Faucets, drains, disposal, dishwasher, toilet and shower run and checked for leaks, with the supply lines and traps inspected underneath.
- 02
Every circuit tested
Outlets, GFCI protection, switches, dimmers and the hood and fan, plus the heated floor thermostat if there is one.
- 03
Doors, drawers and hardware aligned
Reveals even, drawers running true, pulls level and tight.
- 04
Caulk, grout and paint
Sealant at every change of plane, grout complete and sealed, paint cut in cleanly at the cabinets and trim.
- 05
Glass and mirrors
Shower glass plumb, sealed and closing; mirrors and medicine cabinets level.
- 06
Final inspection
Where the permit requires a final inspection, it is requested and passed, and the record goes in your file.
Questions
Common questions about trim-out and the walkthrough.
When can I use the kitchen?
The day of the walkthrough, in almost every project. The punch list is finished around you, and small items rarely stop the room from working.
What is on a typical punch list?
A drawer to adjust, a paint touch-up where the last trade brushed a wall, a grout haze to clean, a cabinet door that needs a bumper. A long punch list usually means something was rushed, which is why the lead walks the room first.
What do I receive at the end?
The project file with photographs of the open walls and the flood test, permit and inspection records, drawings, the selections schedule, manuals and warranties, care notes, spare tile and labeled paint, and one contact for anything that comes up later.
What happens if something goes wrong after the walkthrough?
You call the same contact you have had throughout. Adjustments in the first weeks, a drawer that settles or a sealant joint that needs redoing, are normal and are handled without a discussion.
Ready to start the first stage?
Include photos with your inquiry for complimentary render previews within minutes. Photos are optional.
Prefer to talk first? Call or email during business hours.
- Call
- (312) 210-0016
Related
- How the four stages workInquiry, in-home visit, proposal and build.
- One kitchen, start to finishEvery stage on this page, in one room, in photographs.
- Cabinet and countertop installationThe week before this one.
- Electrical and lightingLayers, dimmers and under-cabinet light.
- Recent projectsFinished kitchens and bathrooms by our team.